Terraform for backing up Arq to S3 Glacier Deep Archive
Introduction
AWS S3 Glacier Deep Archive can be a cost-effective method to back up your files in a secure manner to the cloud. I’ve written about the costs in the past, and now I’d like to show you how to get a S3 bucket and credentials set up to back up to Glacier Deep Archive easily.
To create the AWS resources, we’ll use Terraform, which is a multi-cloud Infrastructure-as-Code product. The major benefit of using Terraform is that the configuration is automatically managed by code and not reliant on a user manually clicking in the console to create resources, which can be error prone. Terraform makes managing and scaling infrastructure easy.
Prerequisites
Creating the Infrastructure
I have made the Terraform code as simple as possible to consume by making two small modules. Modules are simply collections of Terraform code files that can be parameterized to easily create multiple copies of the same infrastructure. In this case, creating multiple S3 buckets and multiple Identity and Access Management (IAM) users can be achieved just by creating a few instances of the modules.
First, create a new folder, and preferably initialize it as a git repository. Then, place the following content in main.tf (or *.tf):
|
|
Don’t forget to change the placeholder name variables above.
Next, simply run terraform init in a terminal in that directory to initialize Terraform. It’ll download the Terraform AWS provider and initialize the backend. Terraform stores a state file locally on your hard drive by default when it creates infrastructure. I highly recommend creating a S3 bucket to store your state file remotely, or use another type of backend to store the file. If nothing else, be sure to at least check in the terraform.tfstate file to source control.
Once Terraform is initialized, you can run terraform apply to create the resources you’ve defined in your Terraform code. From here on out, when you make changes to the Terraform code, you can just run terraform apply to make the changes effective.
Finally, run terraform output my_arq_user_access_key and terraform output my_arq_user_secret_key to print out your IAM credentials to the console. You’ll need those to configure Arq.
Congratulations! You now have a S3 bucket* and an IAM user with access to that bucket. Before we move on to Arq configuration, let’s do a deeper dive into the infrastructure created by the modules.
* I have multiple offsite backup locations, so I’ve created only one S3 bucket and have not replicated it to another region. If your risk profile is different, you should look into enabling cross-region replication with Terraform.
S3 Bucket
The S3 bucket Terraform module creates the S3 bucket and configures it specifically for Arq backups. Arq itself manages what storage class the backup files are put into, so you don’t need to make any special rules in your bucket for moving the backup files to Glacier Deep Archive.
Below is a paste of the main code in the S3 bucket module:
|
|
Let’s go through it resource-by-resource:
aws_s3_bucket
Simply creates an empty S3 bucket.
aws_s3_bucket_versioning
Enables versioning on the bucket. This setting is vital, because it prevents unintentional deletion of resources by keeping noncurrent versions of objects after they are deleeted.
Furthermore, with Glacier Deep Archive, you pay for 180 days of storage even if you store an object for a few seconds. Since you pay for that, you may as well keep that object around at least 180 days.
aws_s3_bucket_server_side_encryption_configuration
Turns on server side encryption for the entire bucket by default. Having an extra layer of encryption at the S3 bucket level can’t hurt, but Amazon does own the encryption key. I also ensure to pick a unique, long, random password to encrypt my Arq archives on the client side before uploading, so that Amazon or any other cloud provider cannot access my files.
aws_s3_bucket_lifecycle_configuration
Enables lifecycle rules that automatically transition noncurrent object versions into Glacier Deep Archive after 7 days and expire them after 187 days. This allows you to recover accidentally deleted files.
aws_s3_bucket_acl
Marks the bucket as private.
aws_s3_bucket_public_access_block
Further restricts access to the S3 bucket, preventing accidental data leakage.
IAM User
The IAM User Terraform module creates an IAM user and gives it full control over objects within the bucket, but only read permissions for a couple of bucket settings; following a least-privilege model.
Below is a paste of the main code in the S3 bucket module:
|
|
Let’s go through it resource-by-resource:
aws_iam_user
Creates the IAM user with no permissions.
data aws_iam_policy_document
Defines the permissions that will be attached to the IAM policy. Note that limited permissions are granted for the bucket, but full control is given at the object prefix level.
aws_iam_user_policy
Creates the policy defined in the data.aws_iam_policy_document block and attaches the policy to the user.
aws_iam_access_key
Creates an access/secret key pair to be entered into Arq for authentication purposes.
Arq Configuration
Open up Arq and click File -> New Storage Location -> Amazon Web Services. Enter in your access key ID and secret access key that you generated earlier. Next, choose the bucket you created.
Now, click File -> New Backup Plan -> <your S3 bucket> and enter in an encryption password. Afterward, you will be prompted to choose the class for your storage objects. Here you should choose Glacier Deep Archive.
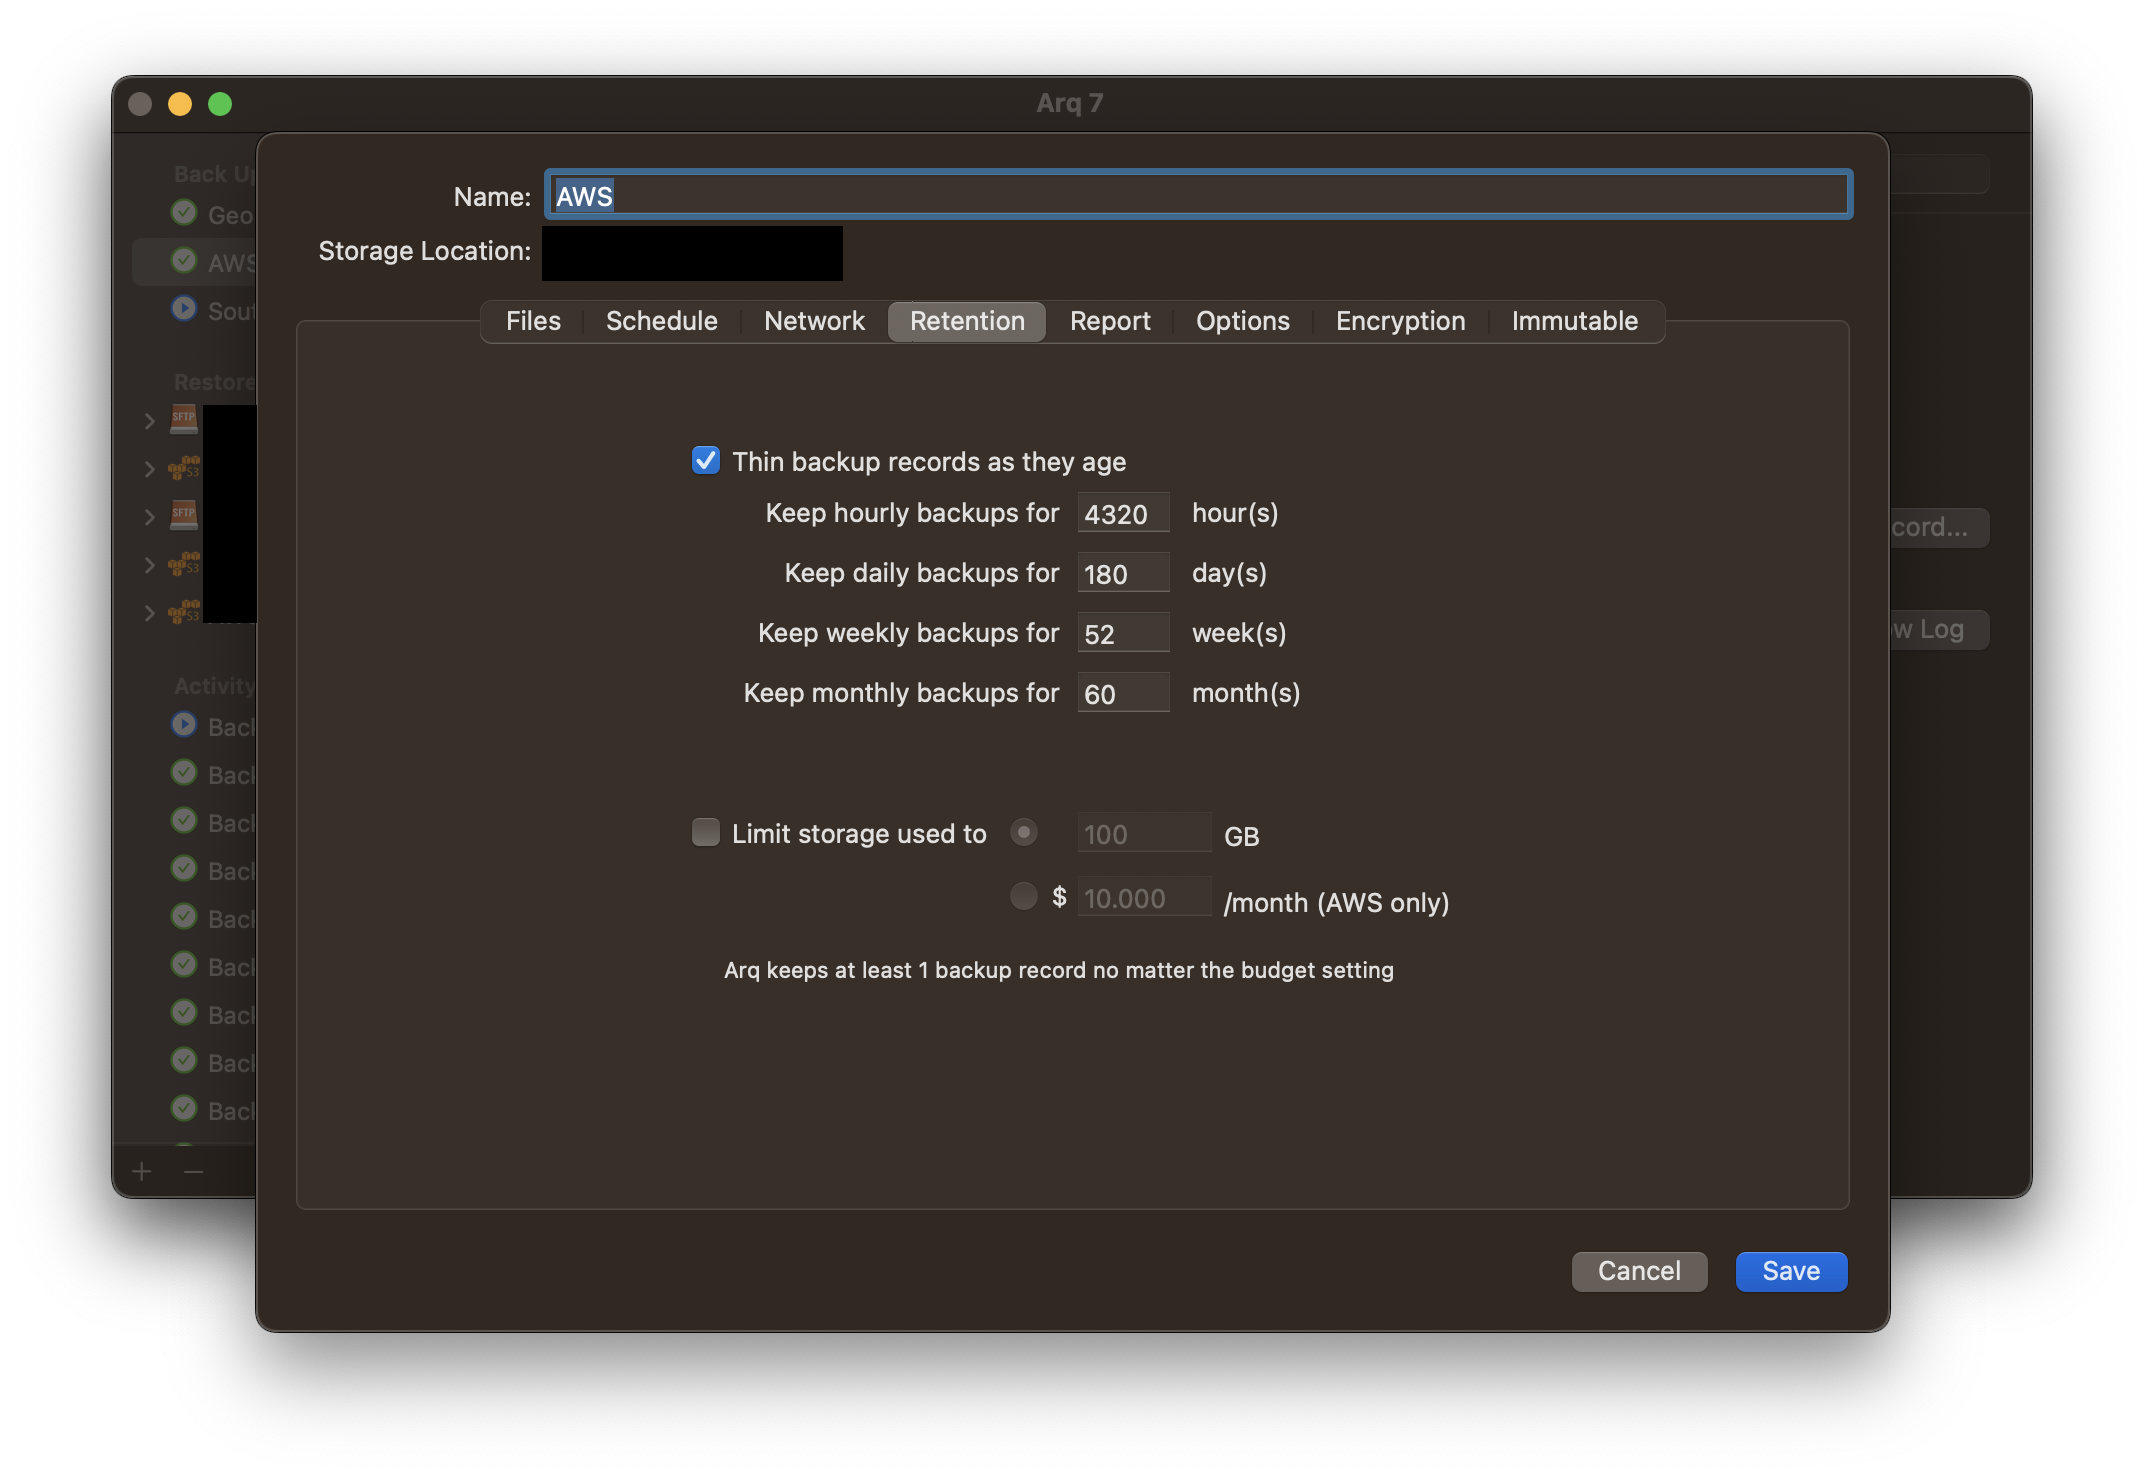
Next, edit your backup plan. We want to retain everything for at least 180 days, because with Glacier Deep Archive you pay for a minimum of 180 days for any object you store. There is no reason to ever delete an object before 180 days. Customize your backup retentions as such:
Summary
That’s it! Arq automatically puts the index files in standard storage, and the archive files in Glacier Deep Archive. Enjoy your cheap backup.
A couple reminders: Don’t forget to watch your bill and look at AWS Cost Explorer to understand costs as you incur them. You will see higher costs the first month because you will be uploading a lot of data to start with. And, restoration can be very costly. Hopefully the cost reduction of Glacier Deep Archive pays off for you.